Thursday, 17 July 2014

How to fix windows 7 genuine warning?


Windows 7 has been known as one of the popular operating system published by Microsoft Windows. Even if Windows 8 is the latest version from Microsoft, lot of users are still using Windows 7 OS. You might be one of them and even experienced the warning such as ‘This copy of Windows is not genuine". Today I am here to show you a simple trick through which you can make Windows 7 genuine without using any software. You just need an access to administrator privileged command prompt.

How to make windows 7 genuine?

You would get the problems such as blank wallpaper with "Not Genuine" warning, Continuously "Not genuine" message prompt, performance degradation of system.

Steps you have to perform
1. Click on Start. search for cmd.
2. Open "Command Prompt" with admin privileges. For that, just right click on CMD and select "Run as administrator".

How to fix windows 7 genuine warning?


3. Type the command as "slmgr -rearm" and hit enter.

How to fix windows 7 genuine warning?

4. Now Windows Script Host popup will appear which will notify that you have successfully completed that command and you need to restart your system.

Done, You have made your Windows 7 system genuine!

getting problems? Troubleshoot here!
Microsoft found the vulnerability just as stated above, so they recovered from this loop hole present in coding with small update package with name "KB971033" . If your system has already installed this update package, then you will get an error message while performing above steps. So you need to uninstall that package from "Unistall a program" tool and have to try steps again. Also you have to disallow system to download update package in future, else you will get the same "Not genuine" warning.

follow the main blog at: http://jahsent932.blogspot.com/

Password protect USB drives without using any software


The easiest and convenient way to carry your digital files is to use pendrives or flash drives. Increasing demands of such types of drives may also cause some security problems, such as stealing the information that was not for an unauthorised user. Many of the third party paid applications are available on internet prompting for securing the data. But why to bother if you can secure the drive by your own without using any application. Today, I am here to show you how to password protect any USB drive without using any application.

Password protect USB drives without using any software
Password protect USB drives without using any software_FunWithTricks.Com

Steps you have to perform
1. Plug in your USB device into machine running with Windows 7 or 8 operating system.
2. Click on Start menu.
3. Search for Bitlocker Drive Encryption. Choose first from results.

Password protect USB drives without using any software_FunWithTricks.Com


4. You should find your flash drive in listing. Turn On bitlocker for that specific device.

Password protect USB drives without using any software_FunWithTricks.Com

5. It will ask you for password. Just fill it with desired one. Click next.

Password protect USB drives without using any software_FunWithTricks.Com

6. Save the recovery key to a file if in case you lost your password in future, it will helpful to retrieve drive contents. You can also print and store this file in microsoft account.

Password protect USB drives without using any software_FunWithTricks.Com
7. Now click on Start Encryption.

Password protect USB drives without using any software_FunWithTricks.Com

It may take some time to complete encryption process depending upon size and speed of data transmission that your pen drive supports. Check whether it's working or not by removing and plugging again into system.
The System will ask you to enter the password to access the data.
Follow the main blog at:  http://jahsent932.blogspot.com

Wednesday, 16 July 2014

Friends of Technology: What is Windows 64-bit Itanium ?

Friends of Technology: What is Windows 64-bit Itanium ?: At times, you may have seen on some Microsoft sites or some download sites, download links being available for Windows x86, Windows x6...

What is Windows 64-bit Itanium ?


At times, you may have seen on some Microsoft sites or some download sites, download links being available for Windows x86, Windows x64 and Windows x64 Itanium as well, and wondered what Itanium x64 stood for. Itanium refers to a processor architecture for Server operating systems, and were also called were called IA-64, where IA stood for Intel Architecture.
windows intel itanium logo What is Windows 64 bit Itanium ?

Windows 64-bit Itanium explained

IA-64 uses the Intel Itanium architecture which is meant for high-performance Enterprise servers and computing systems. It was released in 2001 but its performance was not up to expectations, and it soon sunk like the Titanic – prompting some critics to refer to it as Itanic!
On the other hand, AMD designed the x86-64 processor, which ran both 32-bit software at native hardware speed and offered support to 64-bit memory (AMD64). This is called as x86-64 or now simply as x64. x64 is actually a Microsoft term and stands for Extended 64.
While initially, Microsoft did support the Itanium processor configuration, it later on, dropped Itanium support due to lack of market interest. The main problem with Itanium was that it was not backward compatible, in the sense that it was not able to run x86 software efficiently. It could run only x64 software.
Subsequently Intel too decided to introduce this x64 extension in its own x86-based processors. The Extended Memory 64 Technology or EM64T allowed processors like the Intel Xeon processor to permit 32-bit platforms to access larger amounts of memory supported by 64-bit platforms. It is this architecture that we are now using, as the 64-bit processor in our desktops and laptops.
Microsoft Windows XP and Windows Server 2008 R2 were the last versions of Windows operating system to support the Itanium. Later versions of Windows did not support 64-bit Itanium. Development of the Itanium versions of Visual Studio and SQL Server were also discontinued later on.

Am I running Windows 64-bit Itanium

Users running older operating systems, can if they wish, find out which systems they are running. To do so, open CMD type the following and hit Enter:
wmic cpu get architecture
windows ia64 titanium What is Windows 64 bit Itanium ?
These are the possible values:
  • 0 means x86
  • 6 means Itanium
  • 9 means x64
Thus, when referring to 64-bit architecture, one technically has to be a bit more specific as there are two main 64-bit hardware architectures. The first real 64-bit architecture was released by Intel with this Itanium processor. What we are now using is the ‘backward compatible’ 64-bit extension to the 32-bit architecture, developed by AMD first – followed by Intel.
follow us at:  http://jahsent932.blogspot.com

Recover Memory Card Password of Symbian Phone


Many of us uses password to protect our personal data in removable devices. But it would be difficult to unlock if we forget the password of that device, take memory card for instance, If we will forget its password then it can be a huge problem as our important photos, documents and other files could face a high risk as if you try to format or flash the memory card, password will get removed but as well as all of your important data will also get deleted.

In this article, I will tell you how to unlock or reset the memory card's password in order to gain the access to you important data;

Recover Memory Card Password of Symbian Phone

Steps you have to perform

1. Download the application X-Plore from Nokia store and install it in your mobile phone.

Click here to Download for Symbian S60 2nd edition (Nokia: 3230, 6260, 6600, 6620, 6630, 6670, 6680, 6681, 6682, 7610, N70, N72, N90, Panasonic: X700, X800)

Click here to Download for Symbian S60 3rd/5th edition, Symbian ^3 / Anna / Belle (Nokia E-series)

2. After installing, open the X-Plore app and Press 0 (Zero) and select “show the system files”. You will now be able to see your system files in X-Plore application.

3. No navigate to the following path C:/Sys/Data/Mmcstore

4. Once you are there in the Mmcstore folder, you have to press 3 from your keypad to bring a menu full of options in forward from where you can click on Hex-viewer option to move on next step.

5. You will now see several columns and from them, you need to view the third column in which you will see a line of code like TMSD02G (c??"?x???9?4?4?5?5). Note down the numbers present between the ?. This will your memory card password, in my case 94455.

Finally you have recovered your forgotten memory card password, now you can easily enter the password to view your memory card files or alternatively you can reset your memory card password to a more memorable password.
Follow our main blog at:  http://jahsent932.blogspot.com

Friends of Technology: WhatsApp free for 10 years

Friends of Technology: WhatsApp free for 10 years: WhatsApp Messenger is a cross-platform mobile messaging app which allows you to exchange messages without having to pay for SMS. What...

WhatsApp free for 10 years


In addition to basic messaging WhatsApp users can create groups, send each other unlimited images, video and audio media messages.

Whatsapp free for 10 years


Requirements
1. iPhone or iPad
2. Android or Nokia Device with Whatsapp application

Steps you have to perform
1. Remove WhatsApp from your phone and take help from your friend who have owned iPhone or iPad.
2. Ask him to register WhatsApp with your number.
3. You will get an verification code on your phone, tell him verification code received on your number and enter it on his iPhone. 
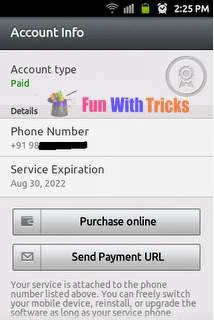
4. After you have done all that steps WhatsApp will start on your friend's iPhone,just check account info and it will be updated to 2022.
5. Ask your friend to delete it and install the latest version on your phone (Download Here) and check its expiration date.