
In the same way that opening your
mouth can get you in trouble, anything you post to Facebook has the
potential of putting you in hot water, too. As we showed you in this article, it can cost your job, if you’re not careful.
So if you care about being employed, here’s some advice: Get your Facebook privacy settings in order before you post.
To make sure that your posts are
reaching the right eyes, and only the right eyes, Facebook has provided
easy-to-use sharing and privacy options. Here’s how to use them (or, to
put it another way, here’s how to keep yourself out of trouble).
From the Update Status boxBefore
sending off a new post, you can actually designate who gets to see it
by clicking the drop-down button just to the left of the Post button. Here you’ll find options for sharing with the Public, which lets everyone read it, and with Friends,
which lets only people you’ve added as friends read it. You can also
share with different lists of friends, which can either be created
yourself from scratch, or by Facebook automatically.
It might be a good idea to create
a list of friends who will enjoy your rants and raves — and that does
not include your employer, or any potential employers. Here’s how.
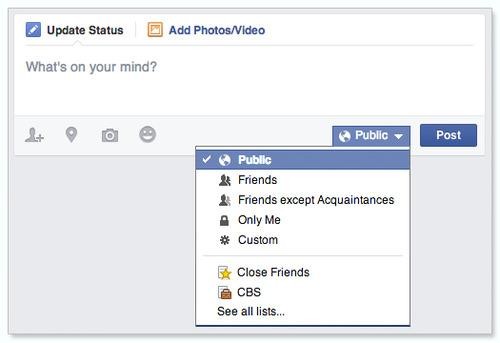
The Status Update box.
Manage lists of friendsFacebook’s
automated lists are tied to interests like school, work, and location,
as well as frequency of contact. You can edit these lists and create new
ones from the Friends settings section. Get there by clicking the Friends header on the left side of your News Feed/Home page (left below).
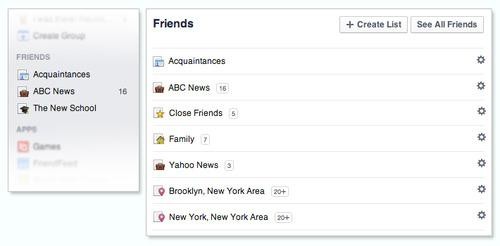
Selecting the name of a list from here (above right) will bring you to its page. Click the Manage List button, and then select the Edit List option to add or remove friends from the list (below).
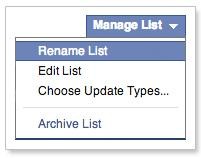
Manage List button from a list’s page.
Next, you’ll see an edit window where you can add and remove friends from your list (below).
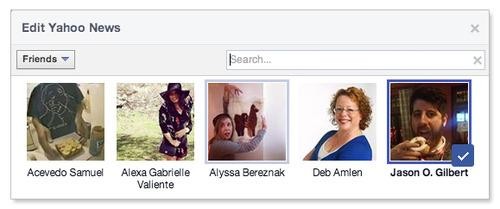
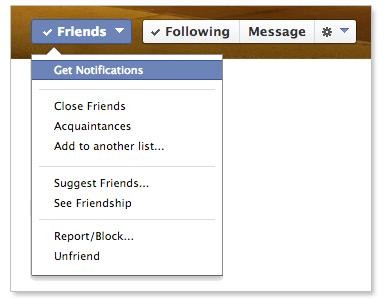
Another way to add friends to specific lists is from a friend’s profile page. Click the Friends button to show a drop-down menu with options (left below).
Now that you’ve created a
privacy-friendly list, make sure you’re sharing your personal posts only
with that list, and not “Public” or “Friends.”
Who can see my stuff?The
options above will keep all your future posts from reaching people whom
you’d rather they not. But what about your old posts? That’s where the Who can see my stuff? settings come in.
To view these options, click the menu arrow (below) from the Facebook home page. Then select Settings from the drop-down box.
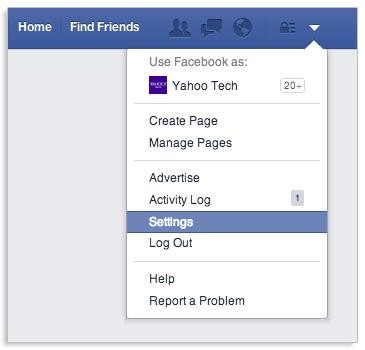
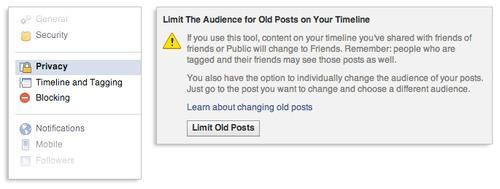
On the left side of the General Accounts Settings screen, you’ll see different categories. Select Privacy. You’ll find the Who can see my stuff? section first in the Privacy Settings and Tools screen.
Turning on the Limit the audience for old posts on your timeline option will change all of your posts that were previously public to friends-only.
The Activity LogAnother option in the same Privacy Settings and Tools menu called Review all your posts and things you’re tagged in
will bring you to the Activity Log (which can also be accessed from the
home page Settings menu). The Activity Log (below) allows you to go
through and remove yourself from other people’s posts that have you
tagged.
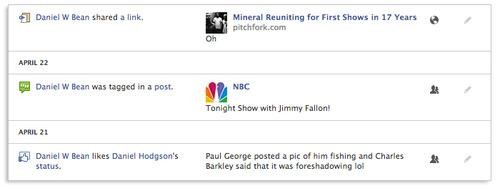
This is for the times your friends check you in somewhere you’re not supposed to be (or maybe when your mother posts an embarrassing picture of you). Clicking the pencil icon and selecting Delete will take the post out of your Timeline and remove your name off of your friend’s post. You can also manually modify the audience of your own previous posts in the Activity Log.
And that’s about it. Take these measures to avoid needless oversharing and ensure that your Facebook activity is viewable only by the groups of friends you choose. And remember, if you do choose to share posts with your boss, make sure to stay off Facebook on your so-called “sick days.”
No comments:
Post a Comment